Eclipse 500 - Fitting Guide
To achieve the optimal sound from your earphones it is crucial to ensure that they fit snug in the ear.
Sound Output Nozzle
Out of the box the earphones do not have a sound output nozzle fitted. There are 3 sound output nozzles included in the packaging, these are short, standard and extended. For most people the standard will work best, for smaller ears we would recommend the short and for larger ears the extended.

Fitting Sound Output Nozzle
To fit the selected sound output nozzle, simply align the nozzle with the threaded opening on the earphone. It is a right-hand thread so carefully rotate clockwise until hand tight. There should be no resistance or force required to thread the nozzle successfully.

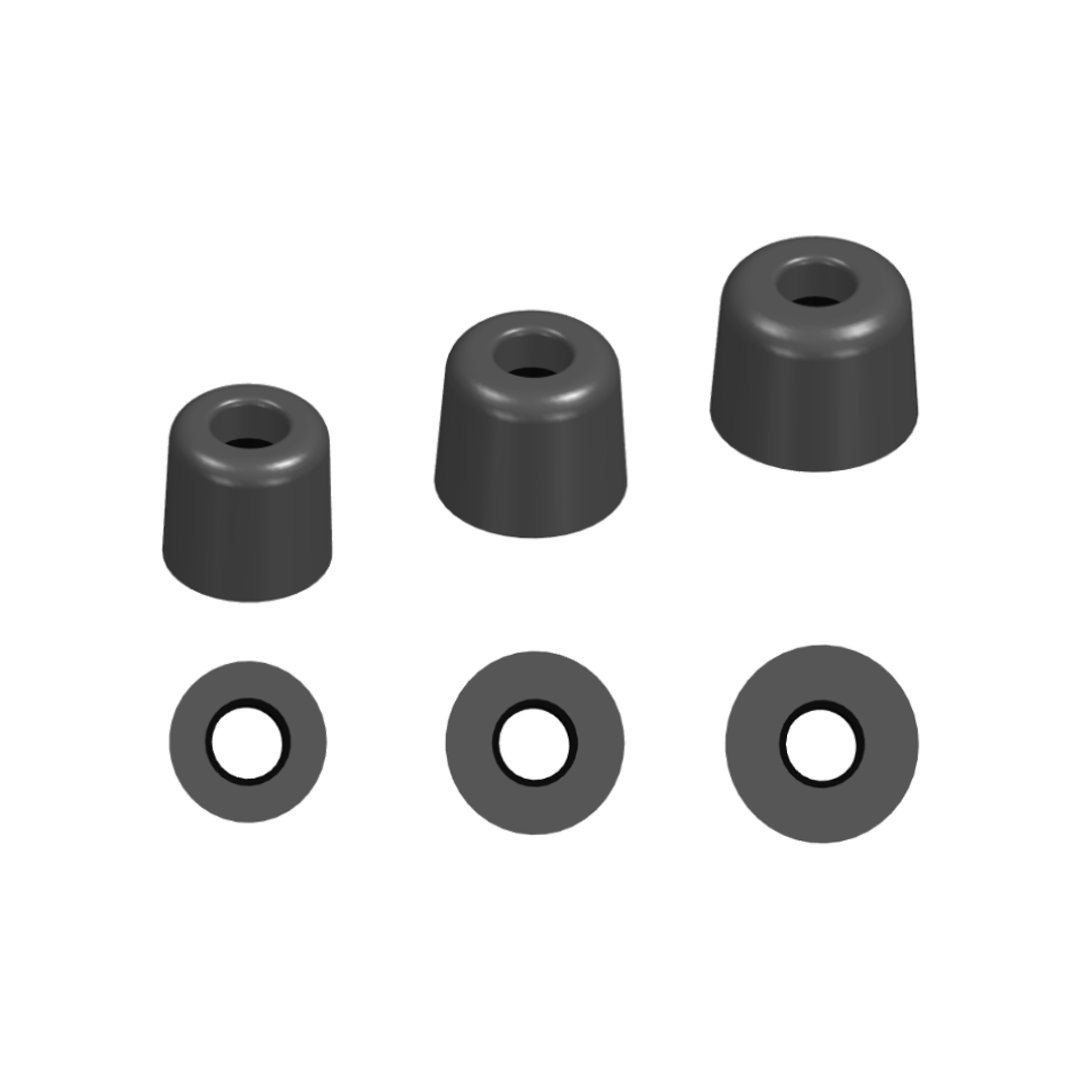
Foam Tips
After selecting the appropriate sound output nozzle, next you will need to select which foam tip size to use.
Included in the packaging is a selection of foam tips, 1 pair each of Small, Medium and Large.
Single size packs of S, M, L replacement tips are available at www.acscustom.com/uk/accessories
Attaching Foam Tips
The foam tip needs to create a full seal in the ear. To attach the foam tip to the earphone, simply align the foam tip to the output nozzle and press downwards firmly until fully seated against the earphone. The foam is high density with slow rebound. The foam tip will squash down and slowly return to shape.

Insertion
The earphones feature a colour dot on the 2-pin connector. Blue dot for LHS and Red dot for RHS.
Align the earphone with the cable looping upwards as shown. Gently roll the foam eartip between your fingers until compressed, the foam is high density with slow rebound. Guide the foam tip into the ear canal opening and gently press the earphone into position. Hold the earphone securely in place for 5 seconds to allow for the foam to expand in the ear. Secure the cable up and over the back of your ear.

Cable Positioning
The cable can be positioned to route either down the back of the neck or to come round the front of the body. Use the slider on the cable to tension once in the desired position.

Earphone Removal
To remove the earphone, grip the earphone and gently twist and rock back and forth until the seal into the ear is disturbed.

Removing the Foam Tip / Sound Output Nozzle
To remove the foam tip, squeeze the foam tip and gently pull up

Removing the Sound Output Nozzle
To remove the sound output nozzle, firstly remove the foam tip, then carefully twist the nozzle counterclockwise.
Be careful not to lose the nozzle.
Replacements are available at www.acscustom.com/uk/accessories

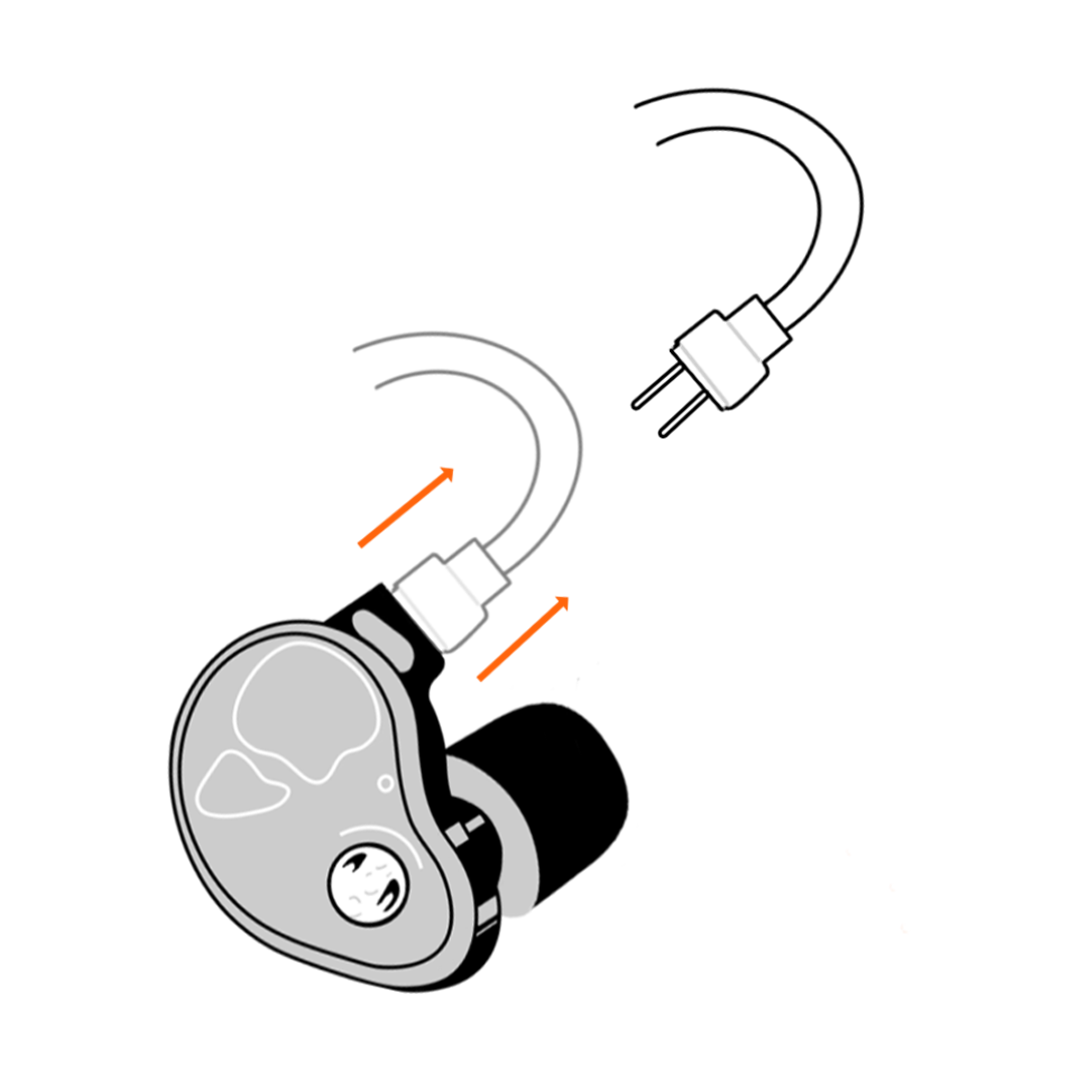
Inserting the Cable
To insert the cable, grip the earphone firmly in one hand, with the other hand grip the 2-pin connector body firmly, ensuring the pins are aligned as shown and press into the earphone socket in a straight motion. The connector will easily go halfway in, then some light force will be required to fully insert.
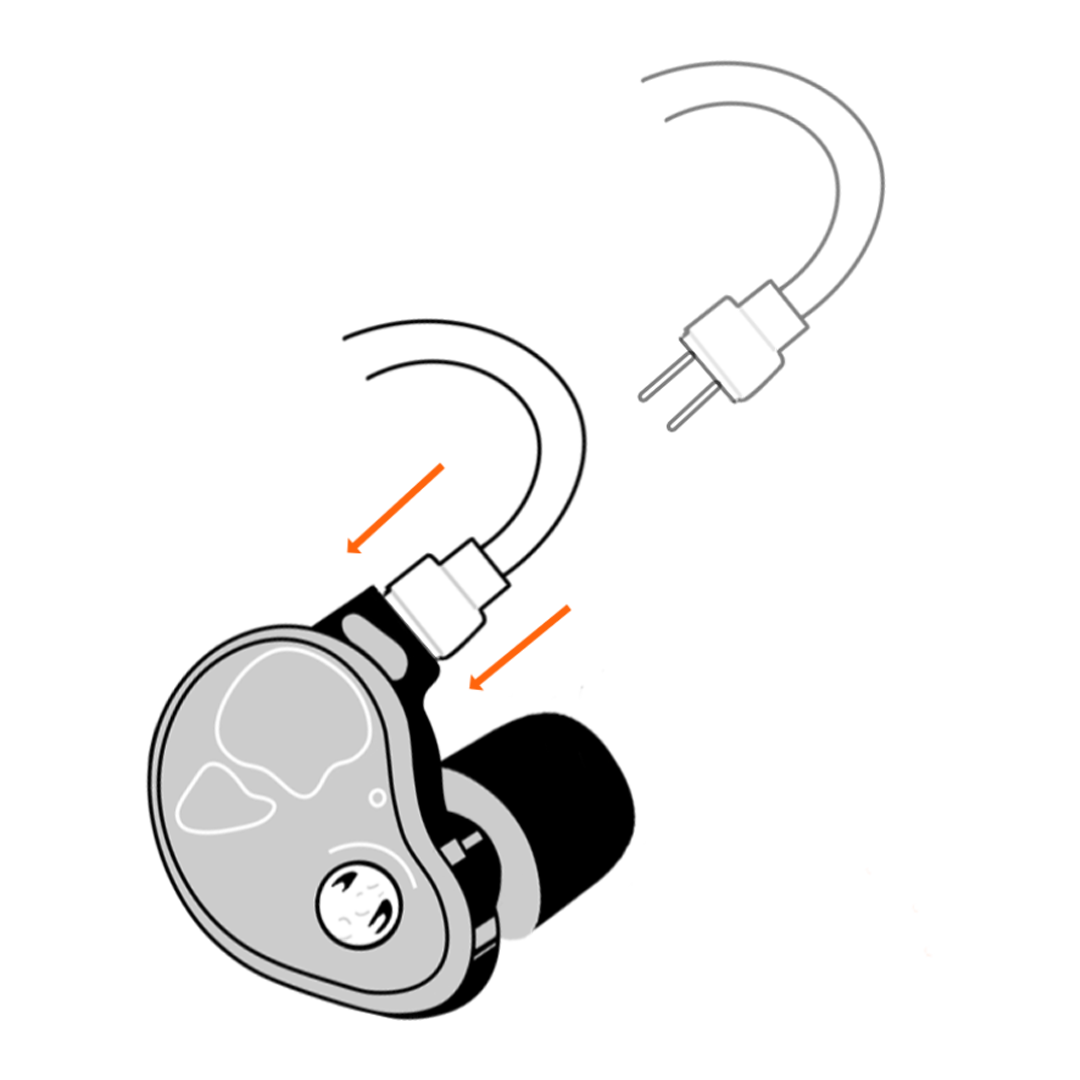
Removing the Cable
The cable is not intended to be removed unless necessary for replacement. To remove the cable, grip the earphone firmly in one hand, with the other hand grip the 2-pin connector body firmly and pull in a straight motion. Do not rock the connector back and forth as this could damage the pins. Also do not attempt to remove the 2-pin connector by pulling on the ear hook or any other part of the cable.
Need further assistance?
Email us at info@acscustom.com